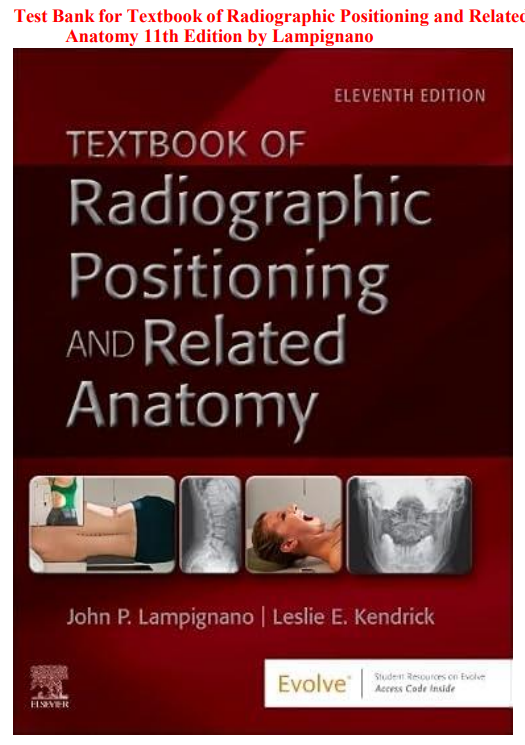


Radiographic positioning is one of those disciplines that looks deceptively straightforward from the outside. Place the patient. Position the part. Expose the image. But anyone who has spent time in a clinical radiography setting knows that the reality is far more complex. The patient is in pain and cannot fully extend their knee. The elderly patient with kyphosis cannot achieve the position described in the textbook. The trauma patient cannot be moved from the stretcher. The pediatric patient will not hold still. And behind every positioning decision is a fundamental question — is this image diagnostic? Does it show what the radiologist needs to see to make a clinical decision that will affect this patient’s care?
Answering that question well requires a synthesis of anatomical knowledge, technical skill, patient communication, critical thinking, and the ability to adapt standard projections to non-standard patients — which is exactly what Lampignano and Kendrick’s Textbook of Radiographic Positioning and Related Anatomy has always taught. The 11th edition continues that tradition with updated positioning guidelines, revised radiographic criteria, current image critique standards, expanded coverage of digital imaging considerations, updated radiation protection content, and stronger integration of the clinical rationale that makes each projection not just a procedure but a purposeful diagnostic act.
This test bank was built to match it. Every question is grounded in the positioning precision, anatomical knowledge, and critical thinking that the 11th edition develops. You do not just memorize which side the marker goes on. You practice understanding why each projection is performed, what anatomy it demonstrates, what the image should look like when it is done correctly, and what went wrong when it is not.
What Is Inside
You get over a thousand practice questions covering every major body region, projection, anatomical concept, and image critique standard in Lampignano and Kendrick’s 11th edition. Questions are written in multiple-choice and select-all-that-apply formats — consistent with what you will encounter on radiography program course exams and the ARRT Radiography Examination.
Every question has a clearly marked correct answer. Every answer includes a full written rationale. The rationale explains the anatomical basis, positioning principle, or image critique standard behind the correct choice and addresses specifically why each wrong option reflects a positioning error, an anatomical misunderstanding, or a departure from radiographic criteria. In a discipline where a technically incorrect image means a repeat exposure and additional patient dose, understanding the reasoning behind every positioning decision is a professional and ethical responsibility.
Topics Covered
The test bank follows the complete structure of Lampignano and Kendrick’s 11th edition across every major content domain, including:
Foundations of Radiographic Positioning — positioning terminology including anatomical position, directional terms, and body planes, patient communication and positioning instructions across patient populations, body habitus types and their influence on positioning and centering, radiation protection principles including ALARA, shielding, collimation, and repeat exposure minimization, image receptor size and orientation selection, source-to-image receptor distance and its effects, beam restriction and field limitation, digital imaging considerations and their influence on positioning and exposure, image critique methodology, and radiographic markers including right and left identification
Chest and Thoracic Cavity — PA and AP chest projections with positioning criteria, lateral chest projection, lordotic projection for apices, oblique chest projections, decubitus chest projections and their clinical indications, chest positioning adaptations for portable and trauma patients, anatomy of the thoracic cavity including lungs, heart, mediastinum, and diaphragm, radiographic criteria for chest image evaluation, and clinical indications for chest radiography
Abdomen — AP abdomen projection in supine and erect positions, lateral decubitus abdomen and its clinical indication for free air detection, anatomy of the abdominal cavity and retroperitoneal structures, radiographic criteria for abdominal image evaluation, KUB versus acute abdomen series, and adaptations for portable abdominal radiography
Upper Extremity — fingers including PA, lateral, and oblique projections, thumb projections including AP and lateral, hand projections including PA, oblique, and lateral, wrist projections including PA, lateral, ulnar deviation, and scaphoid projections with their clinical indications, forearm AP and lateral projections, elbow projections including AP, lateral, and radial head projections, distal humerus and proximal humerus projections, shoulder projections including AP external and internal rotation, inferosuperior axial, posterior oblique, and transthoracic lateral projections, acromioclavicular joint projections with and without weights, clavicle projections, and scapula projections with related anatomy for each region
Lower Extremity — toes projections including AP and oblique, foot projections including AP, lateral, and medial oblique, weight-bearing foot projections, calcaneus projections including plantodorsal and lateral, ankle projections including AP, lateral, and mortise projections, tibia and fibula projections, knee projections including AP, lateral, PA axial for intercondylar fossa, and tangential projections for patella, leg and femur projections, patella AP and lateral projections, and lower extremity trauma adaptations
Pelvis and Proximal Femora — AP pelvis projection and anatomy demonstrated, AP hip projection, frog-leg lateral hip, axiolateral inferosuperior hip projection and its trauma indication, modified Cleaves projection, and imaging adaptations for patients with suspected hip fracture
Vertebral Column — cervical spine projections including AP, lateral, oblique, and odontoid projections with clinical indications, cervical spine trauma series and swimmer’s lateral, thoracic spine AP and lateral projections, lumbar spine projections including AP, lateral, L5-S1 spot, and oblique projections, sacrum and coccyx AP and lateral projections, scoliosis series projections, and vertebral anatomy by spinal region
Bony Thorax — sternum RAO and lateral projections and their rationale, ribs projections including AP above and below diaphragm and oblique projections, anatomy of the thoracic cage, and clinical indications for rib and sternum radiography
Skull and Facial Bones — skull projections including PA Caldwell, AP Towne, lateral, and submentovertex projections, paranasal sinuses projections including Waters, Caldwell, lateral, and SMV projections with clinical significance, facial bones projections including Waters and lateral, nasal bones, orbits, zygomatic arches and Towne projection, mandible projections, and temporomandibular joint projections
Cranial Anatomy — detailed cranial bone anatomy including the calvarium, base of skull, and internal structure, foramina and their clinical significance, ventricular system anatomy, and the relationship between cranial anatomy and radiographic projections
Radiographic Anatomy by System — skeletal anatomy integration across all regions, joint classification and its implications for positioning, bone development and ossification centers and their radiographic appearance, and anatomical landmarks used for centering and positioning
Pediatric Radiography — positioning adaptations for neonates, infants, and children, immobilization techniques including Pigg-O-Stat, pediatric dose considerations and ALARA principles in pediatric imaging, growth plate anatomy and its significance in pediatric trauma radiography, and communication strategies with pediatric patients and families
Geriatric Radiography — age-related anatomical and physiological changes affecting positioning, common conditions in geriatric patients affecting positioning including kyphosis, osteoporosis, and joint contractures, and communication strategies for elderly patients
Trauma Radiography — trauma radiography principles including two views at ninety degrees, positioning adaptations for immobilized trauma patients, cross-table lateral projections for cervical spine and lower extremity, trauma series for skull, spine, chest, and extremities, and the radiographer’s role in trauma team response
Portable and Mobile Radiography — portable chest and abdomen radiography technique, portable extremity radiography adaptations, ICU and operating room radiography considerations, radiation protection for portable radiography in patient care areas, and image quality considerations in portable examinations
Operating Room Radiography and Fluoroscopy — C-arm fluoroscopy basics and the radiographer’s role, sterile field considerations during fluoroscopy, intraoperative radiography principles, gastrointestinal fluoroscopy series overview, and the radiographer’s responsibilities during contrast studies
Digital Radiography and Image Critique — computed radiography and direct digital radiography principles, exposure indicator values and their interpretation, the effect of digital imaging on positioning and technical factor selection, digital image processing and its implications for the radiographer, common digital image artifacts and their causes, systematic image critique using established criteria, and the role of image critique in repeat rate reduction
Who Should Use This
This test bank is the right resource for radiography students in associate and bachelor degree radiography programs whose positioning course uses Lampignano and Kendrick’s 11th edition, students preparing for the ARRT Radiography Examination who want high-volume positioning and anatomy question practice across all body regions, students who struggle with three-dimensional anatomical visualization and need application-level questions to connect textbook anatomy to radiographic appearance, radiography program clinical students who want to reinforce didactic positioning knowledge before and during clinical rotations, radiography educators who need a positioning-specific question pool for building unit examinations, competency assessments, and mock ARRT preparation examinations, and radiography professionals pursuing continued competency or recertification who want a structured review of positioning standards.
Why the 11th Edition Specifically
Radiographic positioning is not as static as it might seem. Positioning guidelines are periodically revised based on updated evidence. Radiographic criteria for acceptable images evolve with advances in digital imaging technology. Radiation protection standards and ALARA applications in digital imaging continue to develop. The 11th edition of Lampignano and Kendrick reflects these developments — with updated positioning guidelines, revised radiographic criteria aligned with current digital imaging standards, updated radiation protection content, expanded image critique methodology, and current clinical rationale for projection selection across all body regions.
This test bank was written to align with the 11th edition specifically. The positioning standards, radiographic criteria, anatomical content, and image critique frameworks in the questions reflect what is in this edition. If your program uses the 11th edition, this is the resource that matches it.
Sample Questions
Question 1
A radiographer is performing a PA chest projection on an ambulatory adult patient. After reviewing the image, the radiographer notes that the clavicles appear horizontal and the posterior ribs appear nearly horizontal as well. The lung apices are cut off at the top of the image. Which positioning error most likely produced these findings?
A. The patient was rotated to the left, causing the left lung to appear larger than the right
B. The patient was positioned with the chin insufficiently elevated, causing the mandible to superimpose the upper lung fields
C. The patient was angled downward with the chin dropped toward the chest, causing the beam to project upward through the thorax and producing a lordotic effect — the radiographer should instruct the patient to stand erect with the shoulders rolled forward and chin elevated before repeating
D. The central ray was angled caudally, causing the ribs to appear foreshortened on the image
Correct Answer: C
When a patient leans backward or drops the chin toward the chest during a PA chest projection, the x-ray beam enters the thorax at an upward angle — producing an effect similar to an intentional AP lordotic projection. The result is horizontally oriented clavicles, horizontal posterior ribs, and elevation of the lung apices off the image receptor, sometimes cutting them off at the top of the field. The correction is to ensure the patient stands fully erect with the shoulders rolled forward to move the scapulae laterally out of the lung fields and the chin elevated to clear the apices. This is a classic positioning error that radiography students must recognize because it produces a non-diagnostic chest image that requires repeat exposure.
Question 2
A radiographer is performing an AP axial projection of the zygomatic arches using the modified SMV position. The patient is unable to fully extend the neck into the submentovertex position due to cervical spine limitations. Which adaptation best maintains diagnostic image quality while accommodating the patient’s limitation?
A. Perform the Waters projection instead since it demonstrates the same anatomy as the SMV without requiring neck extension
B. Angle the central ray cephalically to compensate for the reduced neck extension, maintaining the required relationship between the central ray and the orbitomeatal line, and obtain bilateral oblique projections as supplementary images if the modified SMV remains inadequate
C. Position the patient supine and perform the projection with a caudal tube angle since all SMV projections can be replicated in the supine position without modification
D. Cancel the examination and notify the referring provider that the projection cannot be performed since patient cooperation is required for all skull projections
Correct Answer: B
The SMV projection requires a specific angular relationship between the central ray and the infraorbitomeatal line. When a patient cannot achieve full neck extension, the radiographer must compensate by adjusting the central ray angle to maintain that geometric relationship — ensuring that the beam still passes under the mandible and through the zygomatic arches at the correct angle. Bilateral oblique projections can supplement the modified SMV to provide additional demonstration of the zygomatic arches when the primary projection is compromised by positioning limitations. The Waters projection does not demonstrate zygomatic arches in the same way as the SMV. Canceling the examination without attempting adaptation abandons the radiographer’s professional responsibility to produce a diagnostic image within the patient’s physical capabilities.
Question 3
A radiographer is reviewing an AP knee projection and notes that the fibular head is completely superimposed by the tibia, the joint space appears closed medially, and the lateral femoral condyle appears larger than the medial condyle. Which positioning error produced this image?
A. The patient was externally rotated, causing the medial structures to be projected away from the film
B. The patient was internally rotated, causing the fibula to superimpose the tibia and the lateral compartment to be projected into profile
C. The central ray was angled too cephalically, causing the joint space to appear closed and the condyles to be foreshortened
D. The SID was too short, causing magnification of the lateral structures
Correct Answer: B
In a correctly positioned AP knee, the fibular head should be visible just lateral to the tibia with approximately one-third of the fibular head superimposed — not completely covered. When the lower extremity is internally rotated, the fibula rotates medially behind the tibia, producing complete superimposition of the fibular head. Internal rotation also causes the lateral femoral condyle to project more prominently and can cause apparent narrowing of the medial joint compartment. This is a recognizable and correctable positioning error — the radiographer should ensure the patient’s foot is pointing straight upward or with slight external rotation for a true AP projection, so that the interepicondylar line is parallel to the image receptor.
Question 4
A radiographer is performing oblique projections of the lumbar spine on a patient with low back pain. On the RPO projection, the patient’s positioning produces an image demonstrating the classic Scotty dog appearance of the lumbar vertebra. Which anatomical structures correspond to the parts of the Scotty dog, and what is the clinical significance of this projection?
A. The eye represents the pedicle, the ear the superior articular process, the nose the transverse process, the neck the isthmus or pars interarticularis, and the front leg the inferior articular process — a collar or break in the neck of the Scotty dog represents spondylolysis
B. The eye represents the transverse process, the ear the inferior articular process, the nose the pedicle, and the neck the vertebral body — this projection is primarily used to evaluate disc space narrowing
C. The Scotty dog appearance is produced on AP projections, not oblique projections, and demonstrates the facet joints in profile
D. The Scotty dog structures represent soft tissue landmarks rather than bony anatomy and have no specific diagnostic significance
Correct Answer: A
The Scotty dog sign is the classic radiographic teaching tool for oblique lumbar spine projections. On an RPO or LPO projection, the oblique angle profiles the lumbar neural arch and apophyseal joints in a characteristic dog-like silhouette. The eye corresponds to the pedicle, the ear to the superior articular process, the nose to the transverse process, the neck to the pars interarticularis, and the front leg to the inferior articular process. This projection is clinically significant because spondylolysis — a stress fracture through the pars interarticularis — appears as a radiolucent break or collar around the neck of the Scotty dog. This finding is particularly relevant in young athletes with low back pain and would not be visible on standard AP or lateral projections.
Question 5
A radiographer performs a lateral wrist projection and reviews the image. The radial and ulnar styloid processes are not superimposed — the ulnar styloid is projected posteriorly and the radius and ulna are not superimposed at the distal articulation. The carpal bones appear spread apart rather than cleanly superimposed. Which error in positioning caused these findings and how should it be corrected?
A. The wrist was positioned with the hand pronated rather than in a true lateral position — the radiographer should ensure the thumb is pointing upward with the hand in the lateral position so the radial and ulnar styloids are superimposed
B. The central ray was angled too far proximally, causing the carpal bones to be spread apart on the image
C. The patient flexed the wrist during exposure, causing the carpal bones to separate — the patient should be instructed to maintain a neutral wrist position
D. The SID was too great, causing the ulnar styloid to project away from the image receptor
Correct Answer: A
A true lateral wrist requires the hand to be in a true lateral position with the thumb pointing upward and the radius and ulna superimposed along their entire length. When the hand is pronated even slightly, the ulna rotates anteriorly relative to the radius, projecting the ulnar styloid posteriorly and creating separation between the radius and ulna distally. The carpal bones also lose their clean superimposition in a pronated position, producing the spread-apart appearance described. The correction is straightforward — position the hand in a true lateral with the thumb up, ensuring the distal radius and ulna are superimposed and the radial and ulnar styloid processes overlap, which is the standard for an acceptable lateral wrist image.
Frequently Asked Questions
Is this the official Elsevier test bank for Lampignano and Kendrick’s 11th edition?
No. This is an independently developed study resource based on the content of John Lampignano and Leslie Kendrick’s 11th edition. It is not published or endorsed by Elsevier or the original authors. It is a supplementary exam preparation tool for radiography students and educators.
How many questions are in the test bank?
There are over a thousand questions distributed across all major body regions and positioning content areas in the 11th edition, with strong representation in the highest-yield areas including chest, upper and lower extremity, spine, skull and facial bones, and image critique — the areas most heavily tested on the ARRT examination.
Can this test bank help me prepare for the ARRT Radiography Examination?
Yes. The content in Lampignano and Kendrick’s 11th edition maps closely to the radiographic procedures and radiation protection content domains of the ARRT examination blueprint, and questions in this test bank are written at the application and analysis levels the examination demands. It works best as a supplementary resource alongside a dedicated ARRT review program and simulated registry examinations.
I struggle with visualizing anatomy in three dimensions. Will this test bank help with that?
Yes, particularly through the rationales. Every anatomy-related rationale in this test bank explains not just which structure is demonstrated but why a specific patient position or beam angle produces that demonstration — connecting three-dimensional anatomy to two-dimensional radiographic appearance in the same way that clinical radiography requires. Working through these explanations repeatedly builds the spatial reasoning that is the most challenging cognitive skill in radiographic positioning.
Does the test bank cover image critique methodology?
Yes. Image critique questions are distributed throughout the test bank — asking students to identify positioning errors from image descriptions, determine what correction is needed, and predict what a correctly positioned image should look like. This mirrors the image evaluation component of both clinical competency assessment and the ARRT examination.
Does every question include a rationale?
Yes, without exception. Every question has a correct answer and a full written rationale explaining the positioning principle, anatomical basis, or image critique standard behind the correct choice and addressing why each wrong option reflects a positioning error, anatomical misunderstanding, or technical mistake. In radiographic positioning, knowing why a projection is performed and what a correctly positioned image should look like is as important as knowing the positioning steps themselves.
Can radiography faculty use this to build positioning course examinations?
Yes. Questions are organized by body region and chapter, making it straightforward to build unit examinations covering specific anatomical regions, comprehensive positioning finals, or ARRT mock examination sets. Questions span foundational positioning knowledge through complex image critique and trauma adaptation scenarios, giving educators flexibility to build assessments appropriate for different points in the curriculum.
What file format is the test bank delivered in?
It comes as a digital file, typically in Word or PDF format. You can search by body region, projection name, or positioning concept, print specific chapters for focused study sessions, and access it across multiple devices. Many students find it effective to work through all projections for a single body region in one study session — reviewing every projection from the fingers through the shoulder before moving to the lower extremity — which mirrors how clinical competencies are typically organized in radiography programs.
Is this test bank specific to the 11th edition only?
Yes. It was written to align with the updated positioning guidelines, revised radiographic criteria, digital imaging content, and radiation protection standards of the 11th edition specifically. Positioning guidelines and image quality standards can shift between editions as digital imaging technology evolves and evidence-based positioning research develops. Always confirm your edition before purchasing.



Leo Fernandez –
A perfect study guide
Kevin Cook –
Helps me to stay focused on the most important areas
David Miller –
The study guide made my study sessions more engaging and productive
fred m –
Delivered beyond my expectations
Winnie M. –
Perfectly designed for quick exam preparation
Karen Njiru –
Practice format makes independent revision feel more manageable.
Rosemary R –
Useful companion for reviewing material between classes.
Alicia Silva –
Questions provide a simple way to assess preparation.
Bruno Molino –
Helpful material for revisiting areas that need more attention.
Caleb Martins –
Useful practice set for maintaining steady preparation.
Doris King –
Good resource for reviewing concepts in manageable sessions.
Emily Johnson –
A practical study aid for nursing students.
Zoe Jacobs –
Helpful for reviewing pharmacology concepts and terminology.
Carol Kay –
Helpful questions for reviewing important nursing topics.
Francis Pelosi –
Makes daily exam preparation easier to manage.
Helen Christie –
Useful resource for practicing clinical knowledge.
Terry Anne –
Makes independent revision easier to organize.
Jedida Brown –
Useful resource for refreshing previously learned concepts.
Alan Aaron –
Helps me prioritize topics that need extra practice.